
Creating Events
Spryly's Story Card feature, available to users subscribed to the PRO plan, allows you create and schedule events. The feature is similar to what you might find with something like Evite, but is built-in, and has some unique features.
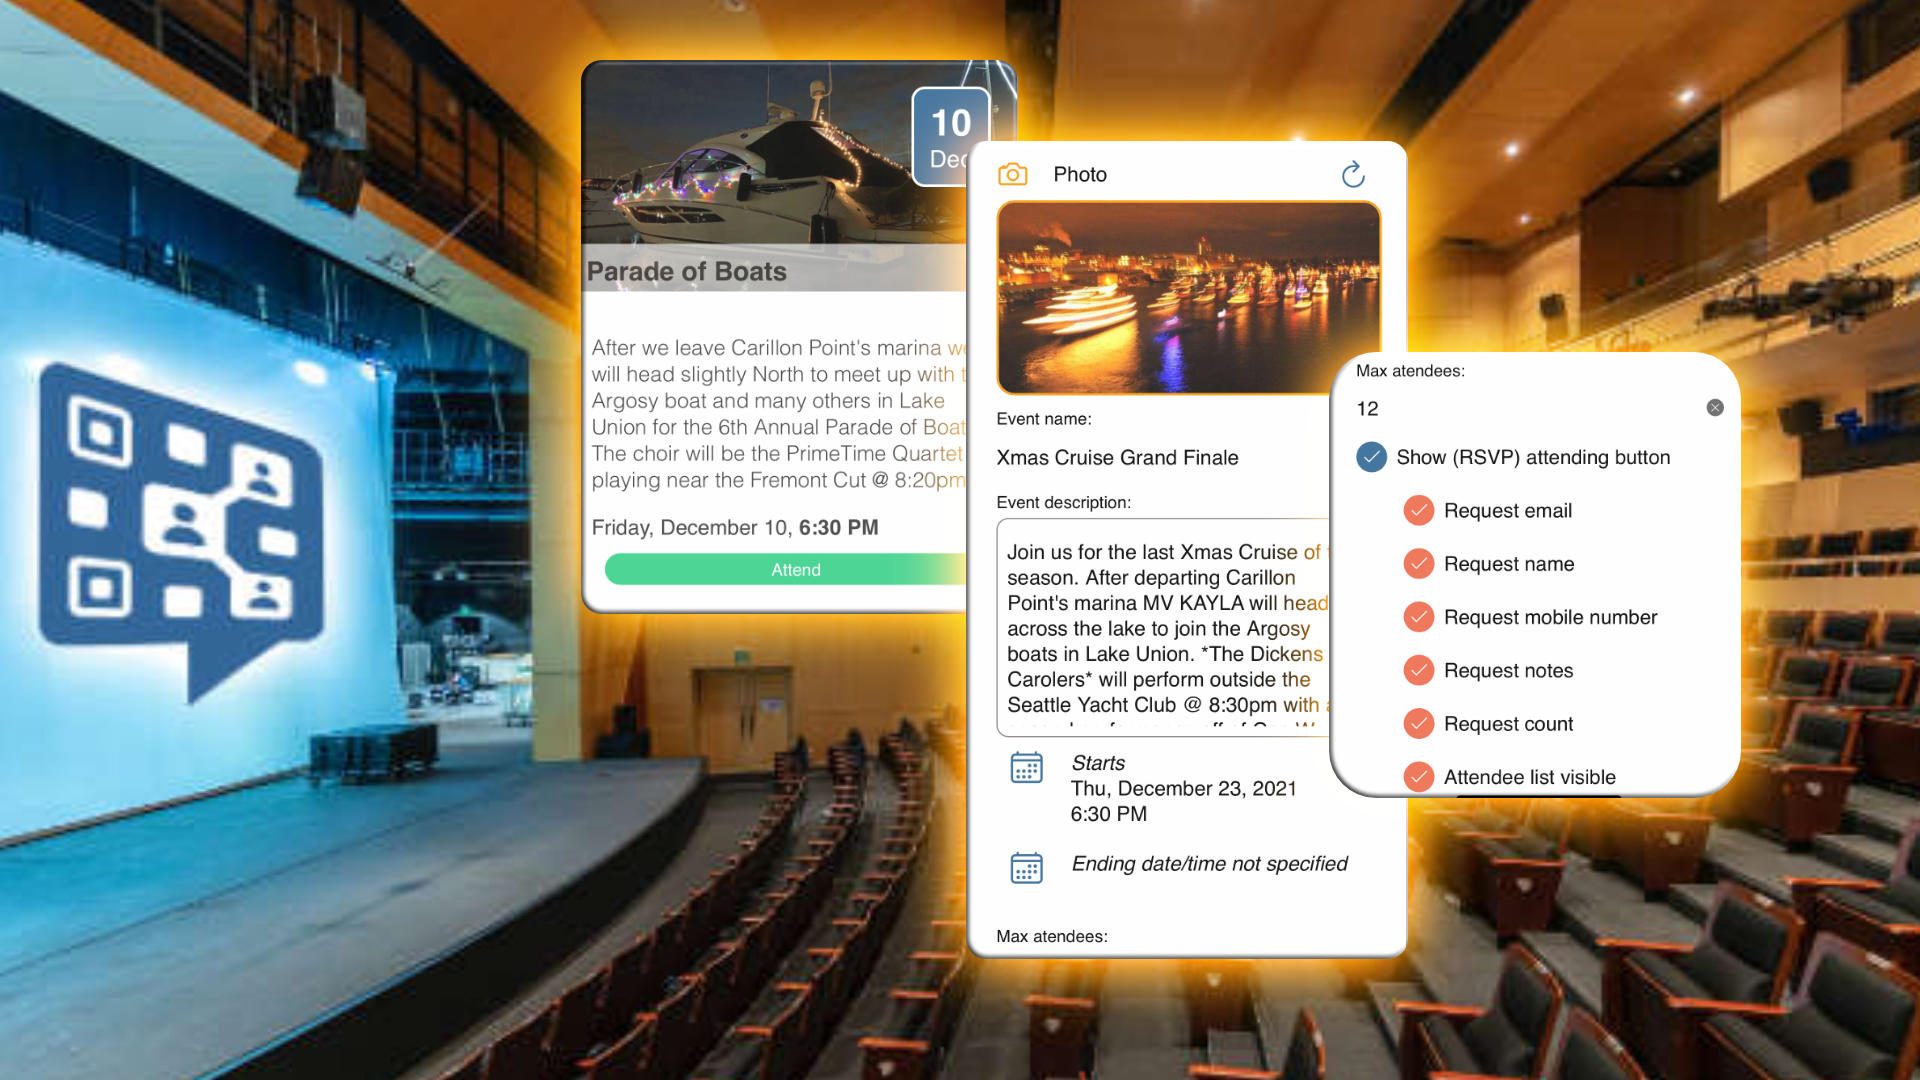
The motivation for this feature came when an event was being planned that required some complex elements to be associated with it, including the need to provide location details, parking instructions, links to other sites and controlling the number of people attending. Using Evite and some other platforms didn’t appear to have all the needed functionality. Plus, it was desirable to share this event using a QR code. So, having that particular functionality built-in was appealing!
Spryly Events actually live inside Story Cards, which is why they can be associated with all sorts of additional elements such as photos, videos, links to external content, and more.
Creating a new event
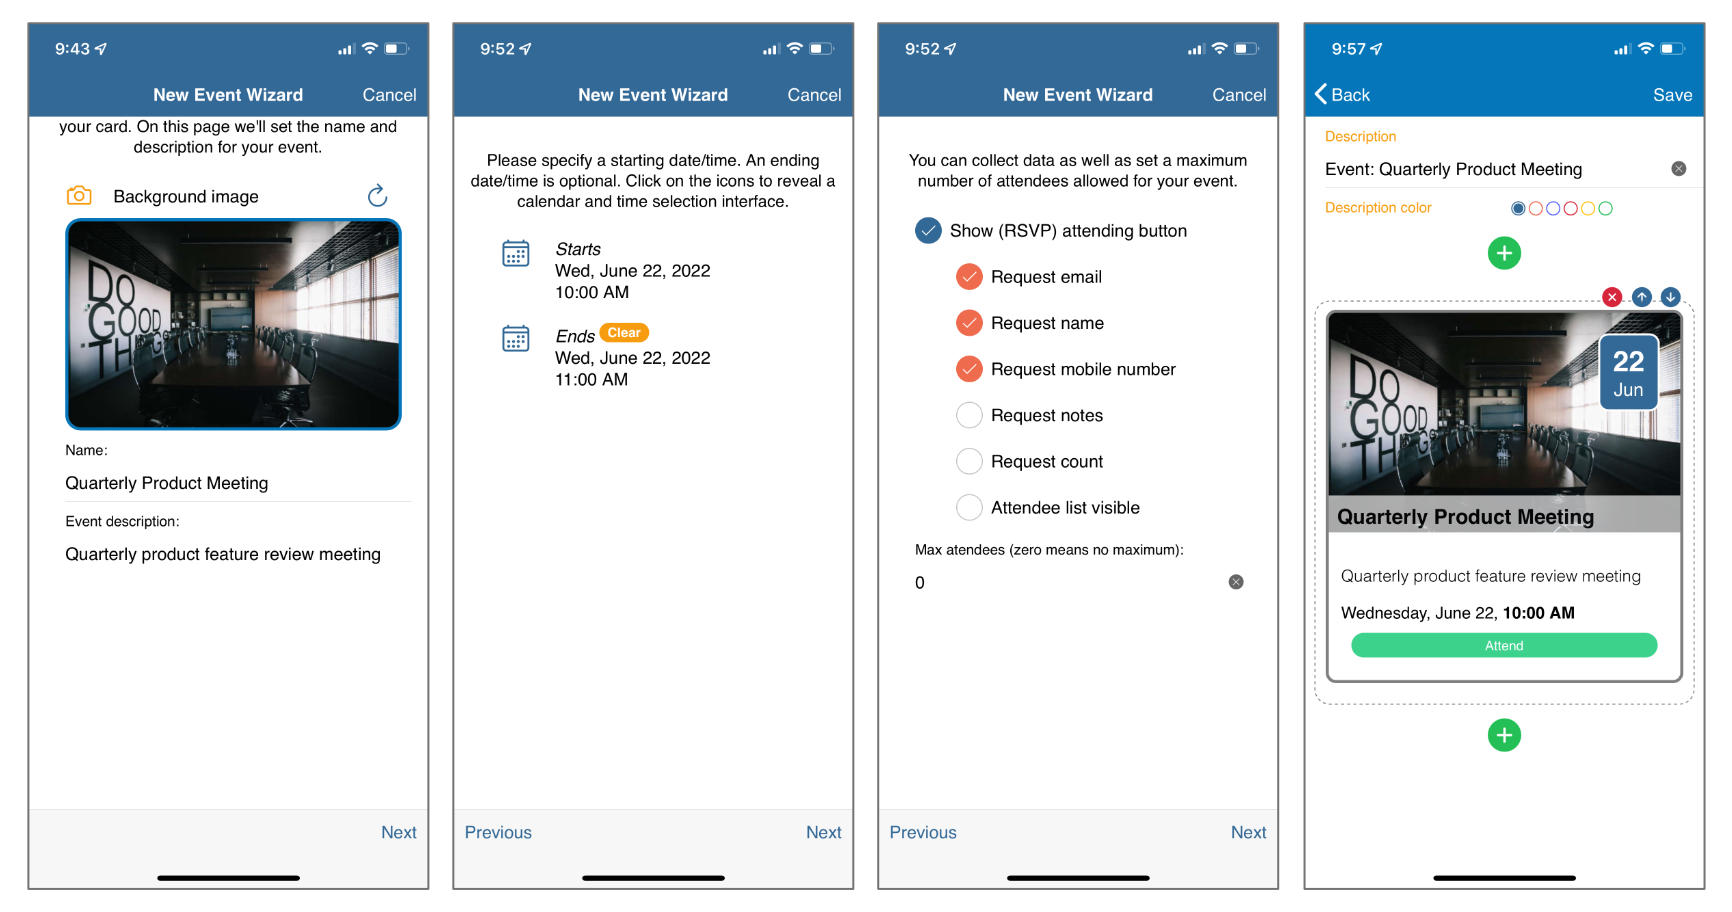
Adding a new event begins by creating a new Story Card or an Event Card, which is a Story Card setup with an event component ready to be edited. Select whichever one you'd like. They both can, ultimately, create the same type of card. For this post we’ll use the new card type of Event Card as it will start with a simple wizard to help you create the event.
Press the plus (+) icon in the top right-hand corner of the screen when viewing your cards in the dashboard. Then, select event card.

The first thing that will happen is a wizard will start designed to help create your event. It has a few screens. The first one will ask you for the name of your event and a brief description. You can also add your own photo to accompany the event, or use one of the default images. If you'd like to try a different image provided by the platform there's a refresh icon that will change the image.
Most of the options are self-explanatory.
Editing an event
Just as with other Story Card components, you can edit an event just by clicking on it within the Story Card editor. You'll see a familiar set of fields and you can change the values. Events must always have a starting date and time, but and ending date and time is always optional.
If you'd like the limit the number of people attending your event you can enter that number in the wizard or when editing an event component. Setting this number to 0 means that any number of people can attend.
All of the fields requested to be provided by attendees, such as their email address, name, mobile number, etc. will all be available for review and download.
Reviewing and downloading attendee data
To review attendee data select View Statistics / Data from the options icon (three vertically stacked circles) in the upper right-hand corner for any card being viewed in the dashboard. If it's a Story Card, with event data, there will appear another icon on the screen that appears, also in the upper right-hand cornder, shaped like a 3D box. Pressing this will reveal event data for each event component within your Stort Card.
Press the Load button to pull current attendee data from the database and the Download (from cloud) button if you'd like to view the data in your favorite spreadsheet program (Excel, Numbers, Google Sheets, etc.).

Multiple events
Story Cards can contain multiple events. This is useful when you have limited capacity and need people to select events with availability. By setting a maximum number of attendees for an event the system will automatically inform someone during the RSVP process if the event is full or will be too full to accomodate the number of people they've indicating will attend with them.
Story Cards
If you'd like to learn more about Story Cards you can view this post.


